Love is all you need (Plus coconut oil, and witch hazel.)

Time to make a skin care post!

Okay, so in most beauty magazines they describe about 3-4 different skin types.

The first one being

Normal Skin
You lucky bastard.

Normal skin is described as being near perfect. Little to no acne or blackheads, small pores, glowy complexion… You get the idea.

Dry Skin
Beauty that rivals the Sahara.

Dry skin is pretty self descriptive. Dry skin, rough patches, wrinkles tend to be more visible and pores are small.

Oily Skin
“I’m naturally sparkly.”

Once again. self descriptive. Oily skin, more acne and enlarged pores.

Combination Skin

The combination for perfection

This is my skin type. Its annoying, unpredictable, and its hard to find stuff that works for my skin.

Combo skin is described usually as having larger pores, lots of blackheads, and shiny skin.
I also experience phases of dry skin but I believe this is due to eczema.

Now to the fun stuff.

So, I used to have long, dark, thick eyelashes until I started wearing mascara and using make up removers. then they started falling out and even fading in color (is this just me or has it happened to anyone else?) I mourned over the loss of my lashes not realizing that my mascara and eye make up remover may be to blame. No matter how gentle I was My lashes would weaken and fall out on their own. Now right round the time that my mom started making me buy my own make up products and the like I realized how expensive make up remover was. I don’t remember how I found out that oils like olive and coconut would remove make up but I think it was because I used it to tan with all the time and when it got on my face my make up would smudge.

Anyways, Buy a jar of coconut oil, take a small amount and rub it on your eyes for a few minutes then take a rag and wipe it away.
Some of the benefits of coconut oil is that its a great moisturizer, it makes lashes grow longer and thicker, And I think its easier to use then store bought make up remover.

It works like Magic.

Well now that your eye make up is off time to take off the rest of your make up.
(You can use coconut oil to take off your face make up to but it tends to clog my pores so I opt out of it.)

My skin is relatively clear. I have some acne around my hair line due to hair products so I break out in small painful oily pimples and suffer from chronic black heads on my nose and chin. I have used every acne cleanser out there. I’ve used black head removers and the pore strips. But nothing works like witch hazel. This stuff is awesome. It cleans skin, tightens pores, and it removes all the dirt. It also works as a great skin toner.
I also get really bad razor burn and eczema and witch hazel helps with that.
If you don’t have time to use egg whites to reduce baggy eyes witch hazel can help with that too.
When I have a painful oil knot I take a CLEAN needle and poke the knot just to open it up a little, then I take a cotton ball soaked in witch hazel and hold it against it for a few minutes. Normally by the next day its almost gone or swelling has gone down.

So for me, and my skin type these are the only two products I use along with a moisturizer. This is just for my skin type. Maybe if you have oily skin just use the coconut oil for your eyes only. And if you have dry skin use the witch hazel AND the coconut oil on your skin and see if that helps. Also using a small amount of argan oil on your face may help.

There may be a transition period for your skin going natural just like there is one for your hair. So keep that in mind when trying out this skin care method.  It took a little while for my skin to get used to my new cleansing method.

Yay for clear, natural skin!
download

So I’ve been slightly M.I.A….

OOPS. Sorry guys, I’ve been kind of M.I.A. lately. Work has been hectic and stressful and I haven’t had the time to blog like I would like to.

Right now I have some upcoming blog posts I wanted to share with you guys.

I’m going to be doing a few unique braiding tutorials that are perfect for second, third, or fourth day hair. Once I figure out how to do the fancy college thingy they do on pinterest. Cause I’m definitely not graceful, nor do I have a good voice for a video tutorial. Just thinking about hearing my own voice creeps me out. Yikes.

Any ways… I’m going to do some unique braids, a 4, 5, and 6 strand braid, A rope braid and various ways to wear it, and what I call a double braid, I honestly don’t know what its real name is but it looks like this. 

IMG_2767


Its the middle one.  I/ll get better pictures with the tutorial, don’t worry.


I also got some new natural hair products from my local earth fare store and I think I have fallen in love. 

So thats what I’m planning right now. I’m hoping to get out of this rut and finally take the time to start blogging again.


Stay tuned, & Stay natural. ❤


A week of new!

Yes, Its a week of new! with a nice paycheck after snagging a few extra hours at work and a some gift cards from family members I was ready to get more serious about my room decor and organizing. I was also able to purchase some much needed ingredients for hair masks and hair care. YAYYY!

I also got the holy of holies.

The one, The only, The rejuvenating,

ARGAN OIL 

IMG_2563

The picture says it all. I LOVE this stuff. I can truly see a difference in my hair. its softer, shinier, and much MUCH healthier.

IMG_2558

Okay, So here is all my new hair/ Beauty products.

I’ve been using the Shea Moisture shampoo and conditioner for about week now. About every other day.  The first few days my hair was a little greasy at the roots, and it felt almost like I didn’t wash it out enough. But after maybe 2 or 3 days that feeling went away completely and left me with amazing silky hair. They have 3 or 4 different types of shampoo and conditioner. I of course was drawn towards the moisturizing one. because have soft hair is #1 on my list of beauty musts. And it definatley has succeeded. Its not a miracle worker and its easy to mess up I guess you could say. If I use too much conditioner my hair is greasy, If I don’t wash it out well enough it it gets greasy. Hell, If I let the conditioner or shampoo soak too long in my hair it will be too greasy. This is the first time in history that I have EVER liked the shampoo more than the conditioner. Some times I don’t even use the conditioner and honestly the shampoo does the job just as well.

After I get out of the shower and my hair is still wet Ive been spraying it with my homemade ACV spray. (Apple cider vinegar)

I decided to try it one day because I used to occasionally rinse my hair with it and I loved the way it made my hair look.  So I took an old spray bottle and filled it with 3 parts water one part ACV and started spraying. It made my hair so shiny and soft. I loved it and haven’t stopped using it since.

Next I use my argan oil on my hair. I use about one or two pumps on my hair and rub it through as much as possible, focusing on my ends of my hair. It took a while to find a good  method for applying it and I’m still working on it. Some times I accidentally put too much on the ends, or on the roots and end up with greasy stringy hair.  You just have to work with it. But it does amazing magical things to your hair. and  a little bit goes a long way. so paying 15 bucks for a 1 oz bottle seems like a lot, But it does stretch quite a bit.

Then I let it air dry and use a boar bristle brush on my hair. Which I’m still getting used to. Only because it takes long to brush out then it would with a comb. I still use the wide tooth comb with bigger knots but that’s it.

So this was my hair about 2-3 weeks ago when I was using chemical shampoos, fake oils, blow drying and straightening it every day.

IMG_2321

And here’s my hair now. I’ve only been using this routine for a  week and a half and I’ve seen great improvement already.

IMG_2568

I hope its not just me noticing the improvement!

I also wanted to show everyone my new bed set cause its just really awesome and really inexpensive.

The grey duvet set was from target and only 30 dollars for a queen and two pillow case. I also found two body pillow cases for 10 dollars and then two standard pillow cases for 10 as well. Now that I have the color base down I cant wait to start decorating and organizing.

Bring on the D.I.Y. pinterest!

YIMG_2565IMG_2564

Yellow and Gray for the win!

get rid of under eye bags. Naturally! + Home made exfoliator

So I was incredibly bored last night and after a marathon of bridezillas had ended. So scrolling through pinterest I found a few natural beauty masks that I wanted to try. Most of them didn’t take me to the actual source and with most of the masks I used my own interpretation anyway.  It was defiantly a messy night for me…. So prepare yourself for some mess. 

Okay the first “mask” was supposed to reduce under eye bags. Which I need desperately. 

The recipe is simple. You need one egg. Separate the egg white form the yolk. Beat the egg whites until they become stiff. and then take a make up brush (or a paint brush) and apply it under your eyes and wait til it dries. I probably waited 5 minutes before it completely dried and I waited a few extra just in case. When its all dried up just wash it off with some warm water.

And it totally worked! I was pretty surprised. 

IMG_2524


(yes its the same eye. I just accidentally used flash in one picture which resulted in some temporary blindness.)


So Science experiment one was a success. Now on to experiment two. A facial exfoliater. 

Okay so this recipe called for a tbs of brown sugar, a tbs of white sugar, coconut oil and mashed berries of any kind. 

Skeptical… yes. 

So I mixed up all the ingredients. ( I used black berries)

IMG_2490


It looked like some ice cream/pie/dessert type thing. but then I mixed it all together and it looked like this,..

IMG_2493


gross. 

So I applied it to my face. First off, The juice from the berries made it incredibly runny. Every time I applied it to my face it fell of into the sink. Not cool. Also the white sugar was so fine that it hurt my skin. It felt more like it was scratching and tearing my skin than exfoliating it. 

So this experiment was a total fail. But then I decided to mix up my own exfoliator using coconut oil, just brown sugar and lemon juice. 

IMG_2494


Much better. And it WORKED so much better. It was really nice too. I could tell it was getting rid of all the dead skin on my face. Also my lips were really chapped and because it was all natural food ingredients I was able to use it on my lips too. And it tasted good! 


I have a few other mask recipes that I stored away for a later time and I’ll be blogging about them soon! 

stay tuned, stay natural. (; 

My deep conditioning experience. + A natural sty remedy.

Alright, so I finally got around to trying this coconut oil hair mask.

I followed the basic instructions except this time I added some coconut milk to the mixture. Not much though. Not even a tablespoon.

I mixed up quite a bit of coconut oil in the microwave because  I have so much hair. I wasn’t sure if I was supposed to apply it on wet or dry hair so I just applied in on my dry hair which I had been combing out for a few minutes.

Now let me tell you why I was skeptical if this would work or not. I have tried coconut oil masks, olive oil masks, honey and coconut oil masks. Basically a million homemade masks all found on pinterest at 2 am. They NEVER worked out for me. I either blame it on the poor instructions, or my lack of common sense at the time. I never washed the oils out. I thought it would defeat the purpose of it. So I was left with greasy, smelly, sticky hair the next day swearing to never believe pinterest testimonials as I aggressively washed and conditioned out every trace of the coconut oil and honey.

So I applied the oil and milk mixture to my hair. I don’t like the way coconut oil smells so that was the biggest struggle. Once I got it all in my hair I used a comb to spread some of the love around. I wrapped my hair in an old t shirt like this.

IMG_2442

Cute, I know.

I followed her advice and let it soak over night. I would recommend this as well having tried it. The only problem is my hair wrap didn’t hold so well. I woke up with it half falling off and really oily pillow cases.

*Invest in a secure, reliable hair wrap, Some duct tap, he-man strength bobby pins, or sleep as still as sleeping beauty.

I washed it out with my garnier frutis shampoo ( I know its not very natural) I did two washes. But I regret that a little. Only because It felt fine after one wash but I was worried it would still be oily so I did two. After two it felt a little dry to me. I didn’t like it. My number one pet peeve is dry hair. I have a shrine of conditioner and hair masks  in my room basically. That’s how much I love having soft, moisturized hair. But letting it dry it started to regain its moisture and I could tell it was going to be really soft. Once it finally dried I was pretty happy with the results. My only complaint is that it was a little static-y. but it wasn’t out of control or anything.

Overall I was happy with how it turned out.

IMG_2454

Oh also! I have something to tell you guys. I think I may have discovered a beauty secret.

I am really prone to stys. The really painful awful swollen bumps you get on your eyelids. Well I had a sty for a good week or so and then I started using coconut oil as a make up remover and a eye cream again after I ran out of my store bought stuff. And that super painful sty that I had had for a while and had been doing everything to get rid of was completely gone the next day. Last night I noticed I was getting a sty on my top eyelid. I put some coconut oil on it and this morning all the swelling and pain was completely gone! It doesn’t make any sense to me why coconut oil would help get rid of stys. I thought it was a coincidence but I did some research on google and found a couple remedies for stys involving coconut oil. So I didn’t discover it on my own. But its a lesser-known beauty secret.

So try it if you get a sty and see if it works. And let me know so I know I’m not crazy!

A few of my favorite things: Quinoa!

oh how I love quinoa.

I love quinoa because healthy food rarely fills me up. I eat fresh fruit and vegetables out of the wazoo but I usually remain hungry after.  Which entices me to order a pizza, or go to DQ for some cheese curds and an cookie dough blizzard. Whoops.

But quinoa is a healthy food that fills me up. And it tastes good. even without seasoning on it. It has a nutty flavor. And when its cooked it has a texture like rice. And its a perfect side dish to some grilled chicken. I even throw a few tablespoons into my salads.

Quinoa is loaded with protein and good carbs. It’s perfect for a post workout or pre-workout snack.

Its a really super duper healthy whole grain. Technically its a seed. You cook it like rice. It’s gluten free, cholesterol free, and kosher. Its almost always organic too. It has 9 essential amino acids in it. About 1/3 cup of quinoa has 160 calories, 3 grams of fiber and 6 grams of protein.

And there’s SO many recipes for quinoa. I’m going to share my favorite pre-workout recipe that I made today.

you will need:

1 cup of quinoa (cooked)

1 Tbs of balsamic vinegar

1 Tbs of Olive Oil

Green pepper (diced)

Celery (diced)

Red pepper (diced)

Cucumber (diced)

Garlic powder, Onion Powder, And Basil.

* You can also use Red Wine vinegar, or ACV. Balsamic tastes the best to me.

Okay, so like I said. you cook quinoa like you would cook rice. My mom made a whole bunch this morning so I just took a cup of it for my saled. Cook as much as you think you’ll need. And if you have any leftover you can store it in the fridge for later.

put the desired amount of quinoa in a pot with water (or chicken broth for extra flavor) and boil it until soft. The way you know its ready is if there are little spiral strings coming out the side of the seed. The texture should be soft but chewy.

IMG_2435

In a small bowl Mix up the balsamic vinegar, the olive oil, and the seasoning. When it comes to seasoning I don’t measure it out. I add quite a bit because I like garlic powder. But it depends on what kind of flavor you want. Also, feel free to experiment with different seasonings.

IMG_2438

Now cut up the vegetables. I listed the ones I use and like best in the saled. But you can use whatever veggies you like.

IMG_2436

Now go ahead and put your quinoa in a bowl with the veggies, add the vinegar mix and mix it up.

And now you have a healthy delicious saled.

IMG_2440

Here are some other yummy quinoa recipes for you to try.

Quinoa Chili 

Quinoa pancakes with blueberry syrup

Quinoa coconut almond breakfast cereal

Cheesy quinoa bites

My second day hair + Homemade deo.

My very first science experiment!

Yes, Its the homemade deo.  I used this recipe. 

It was really easy to make because it only required 3 ingredients. All of which I have in my kitchen.

IMG_2406

Ignore the corn in the background… that is not an ingredient.

Her recipe calls for:

5 Tbs of organic coconut oil

1/4 cup of cornstarch

1/4 cup of baking soda

*I followed her recomendation of adding an extra spoonful of cornstarch. I added about 1 Tbs extra.

I added all the ingredients in a bowl and mixed it up!

When I first started to mix the deodorant I was a little worried the coconut oil wouldn’t stretch enough to mix in all the baking soda and cornstarch but after a few minutes of stirring sure enough, it did. And when the moment of truth came I put on the deodorant It went on exactly like my old liquid deodorant did. (by that I mean it took a little drying time for the oil to soak into my skin.)

I cleaned out and old liquid deodorant container that I hadn’t been using. I took it apart and then added my deo. Now I just did a google search for empty deodorant containers to buy and they have them on amazon but they are surprisingly expensive. Its cheaper just to use and old deodorant container or to buy a brand new cheap deodorant and clean it out. You could also put it in a small jar but I want something I can transport easily.

There’s not very much scent except for the coconut oil. But I’m going to buy some essential oils to add to the next batch. I like floral and vanilla scents. Maybe I’ll mix some and make my own dramatic scent like the other companies.

Now she says in her blog post that it will take a few weeks for your body to adjust to not using the harsh chemicals that is in store bought deodorant. but I’ve been using it for two days now and not had any problem adjusting. Maybe I’m just not  a smelly person. (;

Something to think about. You need to be conscious of how you store your homemade deo. Because it has coconut oil in it if you leave it in a hot car you will have liquid deodorant. And if you store it in a colder space it will become solid. I keep mine in a warm-ish spot so mine is easy to apply.

I also wanted to share a picture of one of my favorite second day hairstyles. I didn’t wash my hair today because I’m trying to cut back on how much I wash it. (plus I’m almost out of conditioner and I don’t get paid til Thursday. yikes.)

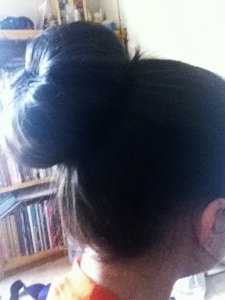
I made my own sock bun. You can find 100+ of these tutorials on pinterest.  I made mine out of two knee high socks that had run their course. you cut off the toes and roll them up into a doughnut shape. like I said there’s a million tutorials on pinterest. I haven’t gotten the hang of this tutorial thing yet.

this is what my sock bun looks like

IMG_2420

 here’s a picture of my hair with it!

IMG_2419IMG_2418

I like big buns and I cannot lie.